Table of Contents
About Windo
Windo is a no-code online store creator solution for solopreneurs, small businesses, influencers, creators, small and mid-sized sellers, and teams. Get started with your beautiful online shop in minutes!
Enabling Payments on Your Windo Store
Windo accepts several different payment modes to accept payments from your customers. Follow the below steps to start integrating payment gateways to your store to enable smoother payment experiences for your customers.
Open the Windo mobile app.
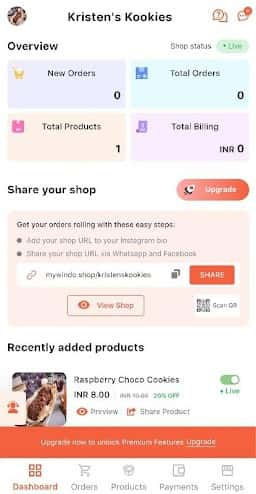
On the home screen, tap on Settings on the bottom navigation.

Under the Shop Settings section, tap on Payments.
You should now see a list of payment modes available for you to activate.
Note: Payment modes will differ based on your region.
You will see two kinds of payment methods – Online and Manual.

When you have not set up any payment mode, cash payment mode will be selected by default. Online Payments You can set up online payment modes based on your region. For India
Switch the toggle button on to enable online payments.

Stripe
To integrate Stripe payments, tap on Connect.
If you do not have one, create one by tapping on Create to integrate Stripe payments.
If you already have an account, tap on Connect.

Now, you will see an in-app Stripe UI to lead you through integrating Windo with Stripe.

Follow the steps to get started.
PayPal
To integrate PayPal payments, tap on Connect.
Make sure you have a PayPal account. If not, tap on Create.
In your browser, log in to your PayPal developer dashboard from https://developer.paypal.com.

Go to Profile, then Dashboard.
If you do not have an app created, move your environment from Test to Live. Then click on Create App.
Enter an app name.
Set the type to Merchant.
Specify the business account that you wish to link.
Then, click on Create App.
Next, click on the generated app.
You should now see a client ID and secret under the API Credentials section.
Copy the details and open the Windo mobile app.
Tap on Connect.
Enter the client ID and secret you received from PayPal.

Tap on Connect once you are done.
You have now successfully integrated PayPal payments into your store.
Paytm
To integrate Paytm payments to your Windo store, tap on Connect.
Make sure you have a Paytm account. If not, tap on Create.
If you already have an account, tap on Connect.

Open your browser and log in to your Paytm account.
Go to Dashboard.
Expand Developer Setting. Click on API Keys.
Go to Production API Details. You will now see a Merchant ID and Merchant Key.
Open the Windo mobile app.
Enter the Merchant ID under the “Enter Key ID” field.
Enter the Merchant Key under the “Enter Key Secret” field.

Tap on Connect once you are done.
You have now successfully integrated Paytm payments into your store.
Razorpay
To integrate Razorpay payments to your Windo store, tap on Connect.
Make sure you have a Razorpay account. If not, tap on Create.
If you already have an account, tap on Connect.

Open your browser and log in to your Razorpay account.
Go to Settings.
Click on API Keys.
Copy the Key ID and the Key Secret associated with it.
Make sure you have whitelisted your shop website in Razorpay before accepting Windo payments. You can do this once you have activated your account.
To whitelist your shop website, go to Dashboard.
Go to My Account.
Then, click on Profile.
Then, enter https://mywindo.shop or your custom domain name URL.
Open the Windo mobile app.
Enter the Key ID under the “Enter Key ID” field.
Enter the Key Secret under the “Enter Key Secret” field.

Tap on Connect once you are done.
You have now successfully integrated Razorpay payments into your store.
Cashfree
To integrate Cashfree payments to your Windo store, tap on Connect.
Make sure you have a Cashfree account. If not, tap on Create.

If you already have an account, tap on Connect.
Open your browser and log in to your Cashfree account.
Go to Developers.
Click on API Keys under Payment Gateway.
Click on Generate API Keys.
Copy App ID and Secret Key.
Open the Windo mobile app.
Enter the App ID under the “Enter App ID” field.
Enter the Secret key under the “Enter Key Secret” field.

Tap on Connect once you are done.
You have now successfully integrated Cashfree payments on your store. You can choose an online mode of payment from the options available in your country.
Manual Payments
Alternatively, you can even choose a manual mode of payment such as Bank Transfer, UPI, etc.
To enable a manual mode of payment, switch the toggle button on for Manual.
Select Cash if you want to allow cash payments.
Tap on Add and enter the required details.
Enter the desired custom mode of payment.
You can even choose to ask for payment screenshots from your customers before confirming their orders.

You have now successfully enabled payments to your Windo online store.